A step-by-step guide on how to set up an air tent, including how to inflate the tent, stake it down, and secure the doors and windows
Setting up an air tent can be a breeze if you follow these simple steps. Whether you are a seasoned camper or new to the world of outdoor adventures, this step-by-step guide will ensure that your air tent is set up securely and efficiently.
The first step in setting up an air tent is to locate a suitable spot for pitching it. Look for a flat and level area free from any sharp objects or rocks that could potentially damage the tent floor.
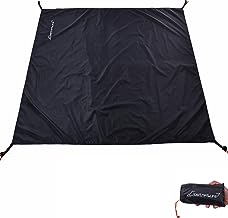
Once you have identified the perfect spot, lay out the groundsheet provided with your tent to protect the base from wear and tear. Now it’s time to inflate the tent.
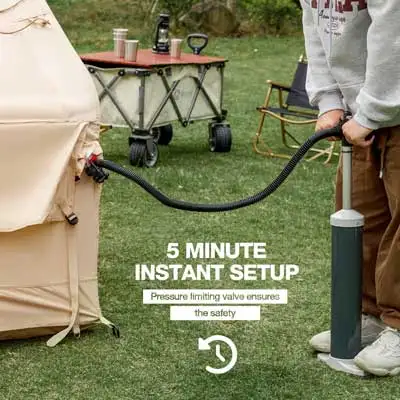
Most air tents come with built-in inflatable tubes, also known as air beams or poles, that replace traditional poles. Locate the inflation valve on each tube and ensure they are closed before starting.
Using either a manual pump or an electric pump specifically designed for inflating tents, attach it to one of the valves and start pumping. As the tubes begin to fill with air, you’ll see your tent gradually taking shape before your eyes.
Continue inflating until all tubes are firm and upright but still have some flex when pressed. Next, stake down your tent to secure it in place.
Air tents usually come with pegs or stakes included in their package. Start by inserting each stake through the designated loops located around the base of your tent.
Place them at regular intervals around all sides of the tent, ensuring they are firmly anchored into the ground. Pay extra attention to staking down corners and guylines for added stability during windy conditions.
With your air tent securely inflated and staked down, it’s time to focus on securing doors and windows to ensure proper ventilation as well as protection against insects and critters entering your camping sanctuary. Begin by opening all doors and windows fully while ensuring any attached mesh screens are also unzipped completely.
Take a moment to check if any debris has accumulated around zippers or tracks and remove it. Once cleared, carefully zip up the doors and windows, making sure they are fully closed, free from obstructions, and run smoothly along their tracks.
This step will ensure a bug-free and comfortable camping experience. By following these steps, you’ll be well on your way to successfully setting up your air tent.
Remember to take your time and pay attention to detail as you inflate the tent, stake it down securely, and secure the doors and windows for optimal performance. With practice, you’ll soon become a pro at pitching your air tent efficiently, leaving you with more time to embrace nature’s beauty and enjoy the wonders of outdoor living.
Tips for troubleshooting common problems when setting up an air tent
One common problem that campers may encounter when setting up an air tent is difficulty inflating it properly.
The first thing to check is whether the pump is securely attached to the tent’s valve. Make sure there are no air leaks by listening for any hissing sounds or feeling for escaping air with your hand.
If you notice a leak, examine the valve for any obstructions or debris that may be hindering proper inflation. It’s also essential to ensure that the pump is set to the correct pressure level recommended by the manufacturer.
If all else fails, try using a different pump or seek assistance from fellow campers who may have encountered similar issues before. Another challenge that can arise while setting up an air tent is securing it firmly to the ground, especially in windy conditions.
One effective solution involves using additional guy lines and stakes provided with the tent kit. These extra lines should be attached to designated points on the tent and then anchored deep into the ground using sturdy stakes or rocks if necessary.
By creating multiple anchor points, you distribute tension evenly and minimize stress on specific areas of your tent structure, thus improving stability during gusts of wind. Additionally, it’s crucial to position your tent in a sheltered area where natural barriers such as trees or hills can provide some protection against strong winds.
Furthermore, when setting up an air tent, it is important to take note of potential hazards in your surroundings that could impact its stability and security. For example, avoid pitching your tent near sharp objects such as thorny bushes or rocky terrain that could puncture or damage its material over time.
Similarly, be mindful of overhead branches and ensure there are no dead tree limbs that might fall on your tent during storms or high winds. By carefully assessing your camping spot before pitching your air tent and addressing any potential risks proactively, you will minimize potential problems during setup and enhance safety and durability throughout your camping experience.
Photos and illustrations that show each step of the setup process
Photos and Illustrations that Show Each Step of the Setup Process One of the most effective ways to convey instructions clearly is through visual aids such as photos and illustrations. In this section, we will provide you with a detailed visual guide that showcases each step of setting up an air tent.
By following these visuals, you’ll have a better understanding of the process, making it easier for you to replicate it successfully.
Step 1: Inflating the Tent
The first step in setting up an air tent is inflating it. To do this, locate the inflation valve on your tent.
Attach the pump securely to the valve and start pumping. As you pump, keep an eye on how much air is being filled into the tent to ensure that it reaches its proper shape.
Once fully inflated, close and secure the valve.
Step 2: Staking Down
With your tent inflated, it’s time to secure it by staking it down. Identify the anchor points or loops at each corner of your tent.
Take sturdy stakes and insert them through these points into the ground at a 45-degree angle away from the tent’s base. Make sure they are firmly set in place to provide stability even in windy conditions.
Step 3: Securing Doors and Windows:
Now that your tent is stable, focus on securing its doors and windows properly.
Start with zipping up all doors completely to keep bugs out and maintain privacy within your sheltered space. Ensure that all zippers are fully closed to prevent any unwanted surprises during your camping experience.
For windows, locate any tie-back straps or toggles designed to keep them open for ventilation purposes during warmer weather conditions. Adjust these accordingly but remember to close them when needed for added privacy or protection from inclement weather.
By visually following these steps through clear photos and illustrations presented in this article, you’ll gain a comprehensive understanding of how each stage should be approached. This visual guide aims to enhance your comprehension, allowing you to set up your air tent effortlessly, even if you are a first-time camper or facing a new tent model.
To Review
Setting up an air tent can be a straightforward process when following these five easy steps. By carefully inflating the tent, staking it down securely, and properly securing the doors and windows, campers can enjoy a hassle-free camping experience.
Additionally, troubleshooting common problems such as leaks or uneven inflation can ensure that the tent remains sturdy and functional throughout the trip. One important aspect to note is that practice makes perfect.
It is advisable to familiarize yourself with the setup process before heading out on your camping adventure. Practicing in your backyard or local park will give you confidence and allow you to address any issues that may arise beforehand.
Additionally, it’s helpful to have a checklist of all the necessary equipment for setting up the tent so that nothing is overlooked. Remember, while setting up an air tent may seem daunting at first, it becomes easier with each attempt.
Acme Toy Company has found the convenience and efficiency of these tents make them a popular choice among campers seeking a comfortable outdoor experience without compromising on quality. So embrace the air tent revolution and embark on your next camping trip knowing that you have mastered this essential skill for creating your home away from home in nature’s embrace!


